Oh the joys of MG ownership.
After a long bout of thriftiness, I manage to save some money towards the rear suspension, So, from three different places I bought :- set of Polybushes for rear spring shackles, lowering kit "u" bolts and spacers with attendant polybush covers, pair of chrome bumper shorter link arms and shorter rebound straps. That was a month or two ago. But being too cold to work outside, I decided to wait till the weather improved. I did have a half hearted attempt at removing the rear axle and springs. It was easy................ish. The "U" bolts nuts came away OK, so did the bottom end of the rear spring. The handbrake cable was a complete enigma on how to detatch. The rubber brake pipe mounted from the battery box union bracket to the 3 way union on the axle would not budge, either end, so I left it be. The axle is supported on a trolley jack and the car on a stout timber 4x4 with 2 axle stands. Sounds a bit illogical but that's the way it is. The front end of the rear leaf spring would not budge, either side. Neither would one link arm come away from the Armstrong damper. After one mistake viz spraying liberally with WD40, they still would not budge. TECHNICAL NOTE . WD40 is not a releasing fluid, it a water dispersant. So if you need to "soak" nuts and bolts etc use PENETRATING FLUID, like Duck oil or whatever. Thanks to Octarine Engine services for pointing that out.
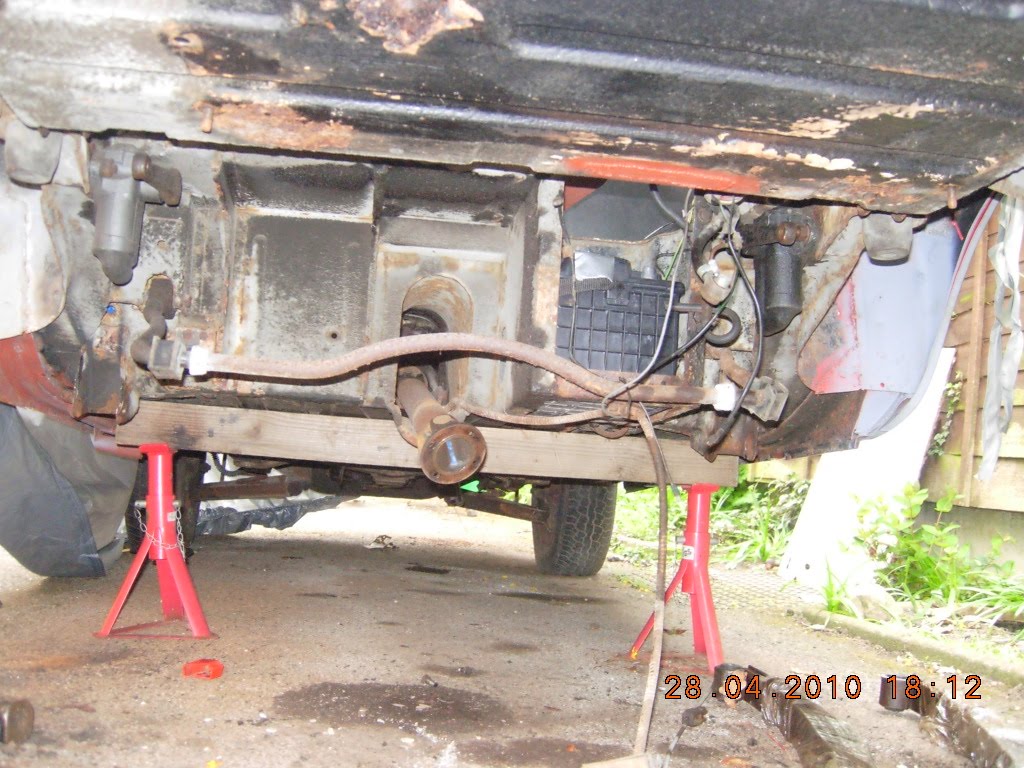
So, that's what it looked like for both sides.

The RH side was probably the most difficult as the battery box and wires all impeded a good heavy swing of the trusty claw hammer. After more ( incorrect ) dousing of WD40 they ( LH & RH front spring bolts, RH drop link) still would not budge. Obvious.......................bigger hammer.
Off to brother in laws for lump/club hammer. Still no joy and still more dousing with WD40.
By this time better weather was upon us so I was going to devote a whole weekend to the jobs to do.
Besides I was itching to get the new stuff on.
Come the weekend the first job was to locate the live feed wire to the fuel pump and the earth. Their are four wires, all dirty black-ish plus a couple of dangley earth wires. I did many years ago label the wires but the elements worked their magic to make them useless. Still I'm a clever git sometimes and I've even got a multimeter ( £2.99 from Wilko's- only the best for me...hehe) and wiring diagram, so I should be able to work out the wire feed & earth. No.No.No. Even with battery connected there was no current flowing with the ignition turned on. Now here is the start of another story not yet told.....................the car immobiliser, fitted circa 1978-ish with sh** loads of red wires under the LH dash + secret on/off switch under RH dash. Methinks these have an effect on the current flowing but I'm not that much of a clever git to understand that load of spaghetti.
So we'll leave that for when I attempt the electrics proper.
For now all I wanted to know is which wire and does the fuel pump work ? I settled for the does the pump work ?
Simple answer..........................No. Rats rats and more rats. Even the recommended tap on the side didn't do the trick. I left it a day to re-think. Moved on to more nut bashing with the lump hammer. Still no joy. The LH spring mounting bracket had taken a few hits and was beginning to bend inwards. Time for some more thinking and formulating.
BBS webring and MG forum gave the answers. Loads of em. varying from use a "sawzall" ( From the U.S bless em, they mean a reciprocating linear saw blade, i.e jigsaw or power blade ) to cut the bolt heads off, to drill through the bolt ends each side. I opted for Octarines method. Use a thin grinding disc and grind up between the spring and bracket through the bolt each side. It worked a treat. Marmalised the end of the spring a little but ,hey its off and usable.
here's proof................and them bloomin bee's are back.
The spring has had a good clean up with the wire thingy in the angle grinder. Looks almost new. Gave it a liberal soaking in thin oil and cling film wrapped it till I'm ready for the next bit.
As of yet I've not tackled the other spring removal. This is only because today ( Saturday) I forgot to buy a new thin grinding disc and I'm working most of the weekend in the pub. I chilled out and caught some rays in the garden. Uni has been manic, with a 6 week placement just ended, one exam the first week,1st day back. Essay to do + another exam + Dissertation proposal hand in.
What I did do a few weeks back is :-
.jpg)

All the parts holding the axle were wire brushed clean using the angle grinder then primered ready for a nice coat of black paint. Top shows the spring and tools I used for the rubber bush removal. Its a composite bush inside the end. As you can see I had to destroy it to get it out. I think destroy is a little understatement. It was rusted solid and no way was it going to shift. Even if I had a press of 100 tonnes, i doubted it would have moved. The Bush is a thin outer of tough steel, a thick rubber inner then another thin steel inner. The offending bolt that would not come out was stuck to this surface. Its the rubber that causes all the problems. It does its job and resists and dampens any forces applied. I drilled several holes through the ruber and chisseled down the outer shell pushing it inwards as I went on. I bet the fitting of a new one will be even tougher. Which reminds me. I don't have a replacement. Thats why I'm working all weekend, I will need two, plus bolts/nuts and the rubber bump-stop pedestal. Mine disintegrated when the original "U" bolts came off. Anyways. Up until yeaterday I was also convinced I needed a new fuel pump. I tried several times time connect it and make it work.Stripped it down, cleaned it and the contacts, but to no avail. Not even a murmur. So, I checked You-Tube, John Twist of University motors again. These are wonderful clips from an MG man through and through. The clips show all the tricky probs and remedies for loads of mg makes. Tiz a pity its no longer in business.
This time I cleaned the testing wires thoroughly and the battery terminals. Rechecked and cleaned the points with emery and Bingo........................buzzzzbuzzzzzzbuzzzzzz. It now works a treat. So, since I have a day off from Uni Monday I'm ordering said parts + paint and next weekend will see me remove rear spring, clean it up, paint parts black, remove some ( lots) crud from axle, fit RH armstrong damper ( thats how I removed RH lever arm - with damper in situ and attacked on the bench- easy peasy) fit fuel tank and hopefully Sunday fit spring and new parts. If I can re-fit new front bushes. This is going to be a drama, I can feel it already !
Just to prove the car and project is politically correct and in line with all green issues I'm recycling as much of the car as possible. I've used the old doorskin for most of the patch panels on the rear and will be using it again for the door slider bracket. These have rusted badly and needed removal when I replaced the doorskins. I kept one to use as a template. They are handed too, so I made a paper template.
Look !

More soon folks !


.jpg)

