Its because that's how many colours I've tried on the engine bay. Bear in mind the engine bay should be the same colour as the rest of the car.
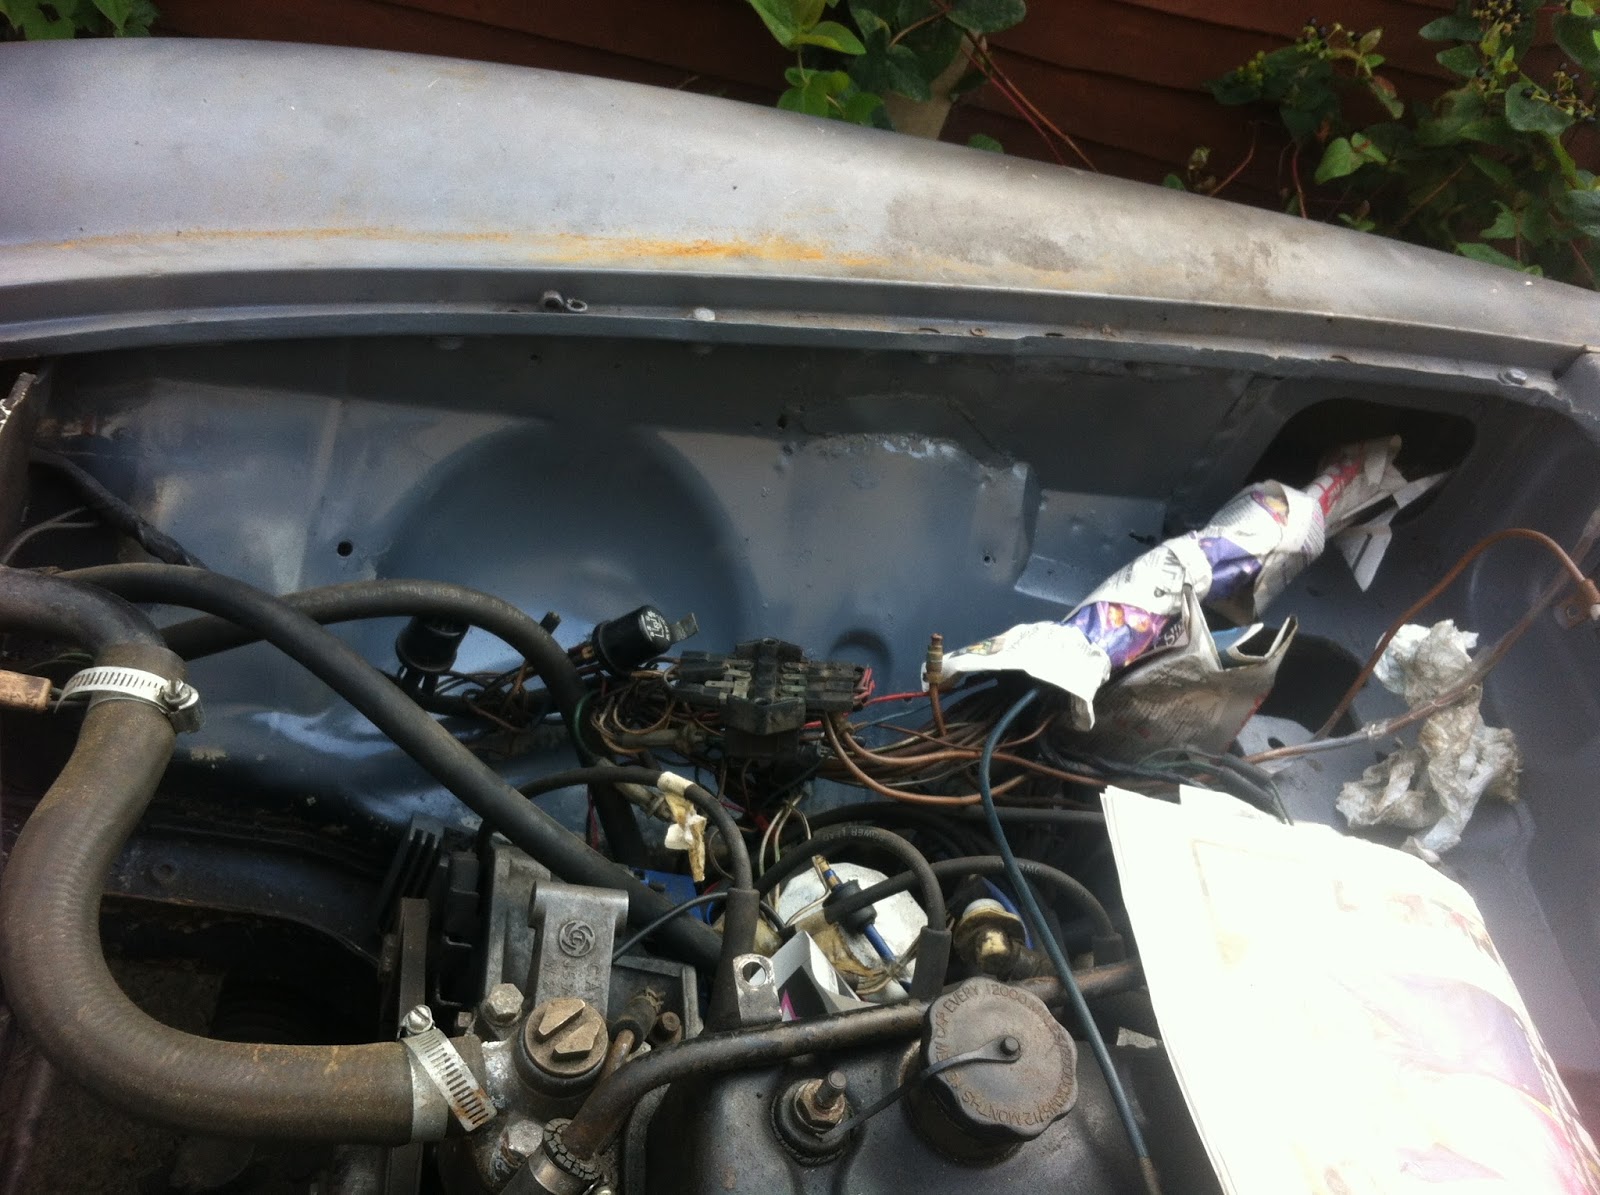
So, in theory I had to make this monumental decision NOW ! as I was keen to get all the stuff I'd taken off, back on before I either lost the parts or forgot from where or both. The Inner engine bay sits in a nice shade of fresh grey primer. The pedal box, Vacuum cover, coil, expansion tank, heater and various brackets, nuts , screws and bolts have all been cleaned and are looking great in Black gloss (Halfords).
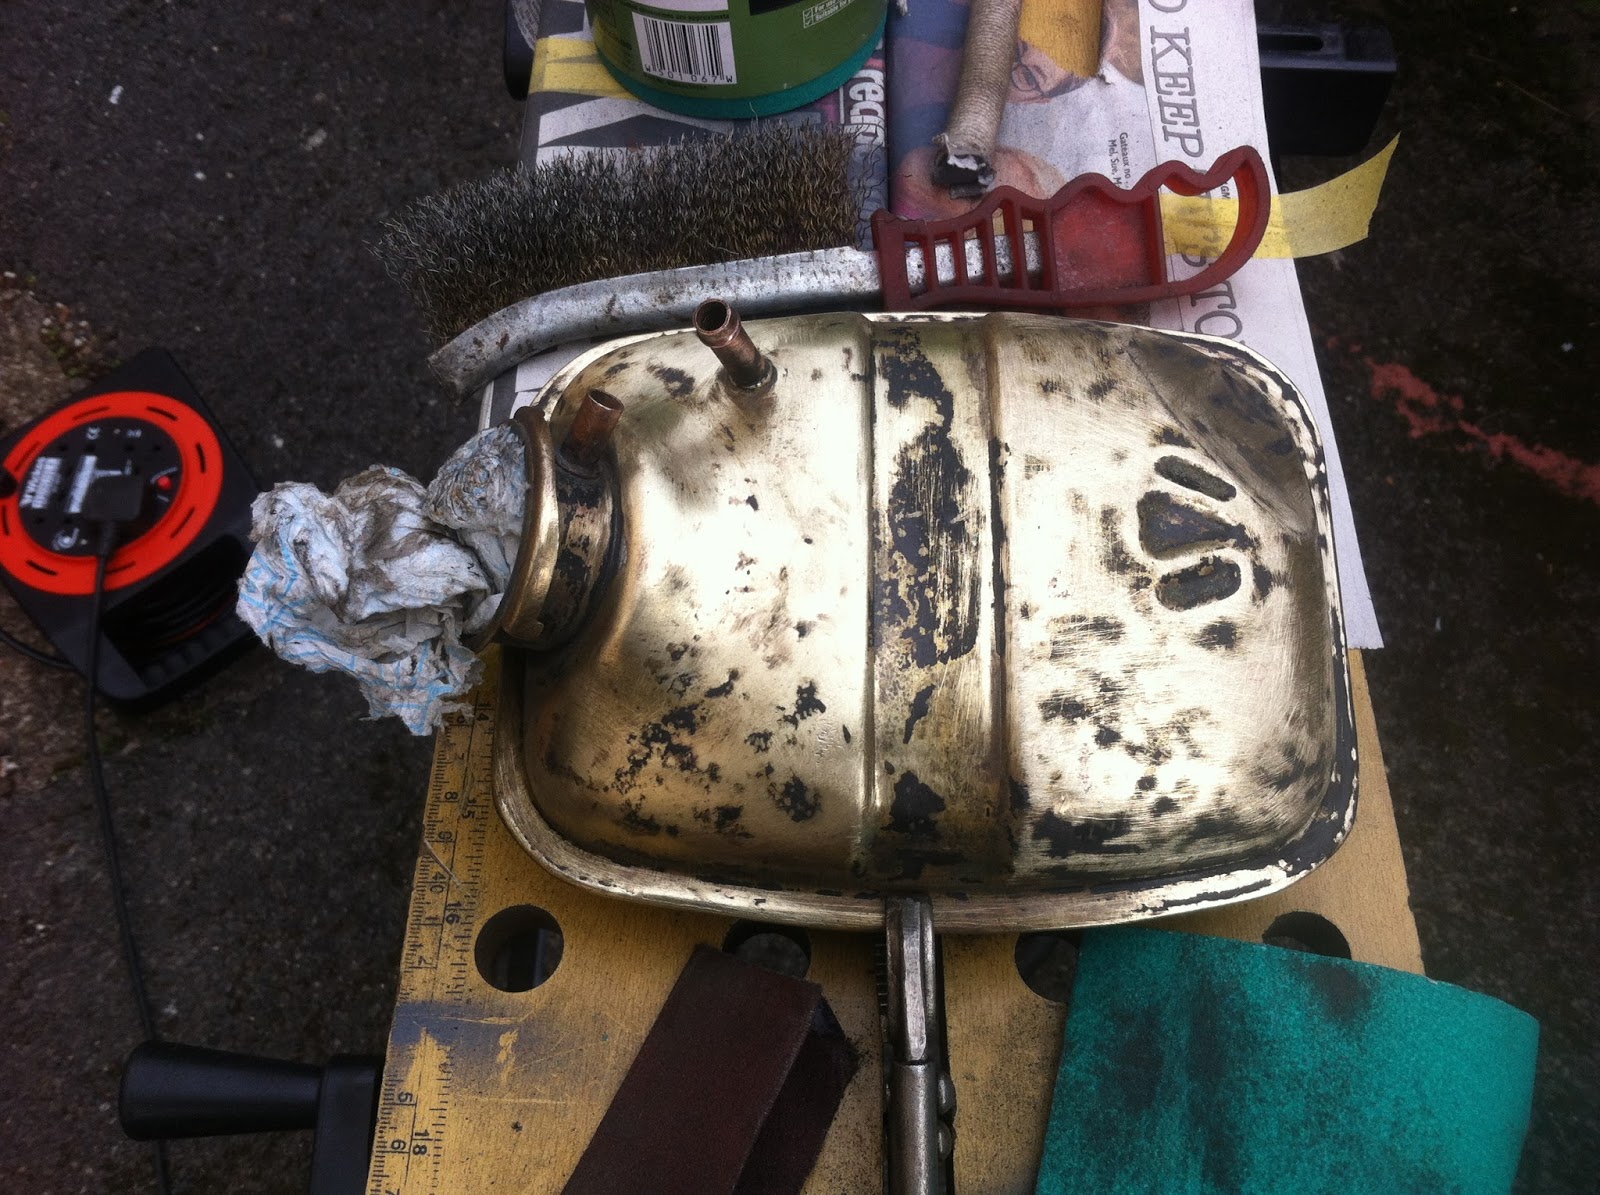

Thing of beauty, Brass Expansion tank. Seems a pity to cover it but needs must. Came up excellent after 2 coats of black gloss and probably the best looking thing so far. The cap looked good in Plasti-cote Silver too.

Above was the Vacuum cover before cleaning with wire cup in drill for 20 mins

After 2 primer coats and 2 Black coats

Same treatment for heater too. ( Note it looked this good 4 years ago when I first did it )
So now the real gripe of late and cryptic answer of title thread.
The colour took three attempts at a costly £8.00 per can to decide, and I'm still not convinced but went ahead anyway.
First Attempt was Plasti-cote Brushed Aluminium Silver. Lovely coverage but oh so very silver and reflective. It also showed any flaws in the bodywork ( several small patch welds by P.O ) like a poke to the eyeball. Was very surprised how metallic it was, but not a good look for under the engine bay.
Next attempt was Peugeot Iron Grey Metallic. This I thought would be very close to the body Colour I envisaged. WRONG ! Very WRONG. It was almost Iridescent bluey/green. I don't have photos as I'm too embarrassed. Besides, money was low and I needed to crack on.
My Third and final option was the Halfords Gloss Black. I bought this at the time of the Iron Grey so I could re-coat some bolts and brackets etc. But in it went to coat the bay, quickly, the original colour I bought it with...doh
Below is the engine bay in 1 & 2 wire wool'ed and cleaned then 3 & 4 just Grey primered


How I wish I'd left it in grey primer, it looked good. But the deed was done and there was not a lot of time left in Lostsocks weekend.
An early start saw the heater go back in without drama. Pedal box too, although some BSF bolts seemed to strip partially or at least grab gingerly. The vertical bolts on the outside were a swine for me with my fat-ish mitts.
This is where I hit the frustrating and typical Leyland enigma !
The coil bracket (2 fasteners), Pedal box (7 Fasteners) Fuse box (2 fasteners) electronic Ignition (2 fasteners) earth screw ( 1 fastener) 2 relays ( 2 DIFFERENT fasteners) and overflow tank brackets ( 2 Fasteners)
WERE ALL DIFFERENT SIZED BOLTS/SCREWS !!!!
So In an act of complete rebellion and a vote against BREXIT I used M5 bolts, nuts and washers for the fuse box, relays, earth screw and Ignition box !!
It looks good, has a shiny chrome Phillips heads in the bay and M5 nuts in wheel arch but who cares !
I must admit it was very frustrating when undoing them, as if rusty , old, gnarled heads were not enough to deal with a different method was required. In truth most needed mole grips as the phillips heads were well rounded or slotted heads gnarled.
So this is how I left it. Look at that expansion tank and cap gleam. Still needs more work after spending hours cleaning the mess of wiring with WD40 and brillo pad thing. It shines. Just ordered some new black wiring tape from Frost Auto, so when that's done I may actually start the engine before winter, I may not, who knows. Here's praying for a mild winter or money and a garage/shed
Keeeeeep restoring !!

1 comment:
Great to see you're still at it!
Post a Comment